

Home Solar Installation — Everything You Need to Know Before You Begin
Home solar installation is one of the most significant upgrades a Bangalore homeowner can make in 2026 — and for most families, it pays for itself within two to three years. However, the process involves far more than putting panels on a roof.
What Is Home Solar Installation?
Home solar installation refers to the complete process of designing, supplying, and installing a rooftop solar system on a residential property. It includes the solar panels, inverter, wiring, mounting structure, protection components, and grid connection — all installed.
Is Your Home Ready for Solar Installation?
Before solar panels for your home can be installed, a site assessment checks three key things. Understanding these upfront saves time and prevents surprises during the installation process.
Rooftop Condition and Space
Your rooftop needs adequate unshaded area facing south or southwest for maximum solar generation. As a general rule, a 1kW solar system requires approximately 8 to 10 square metres of rooftop space. Moreover, the roof structure must be strong enough to carry the additional load of the panels and mounting system — typically 15 to 25 kg per square metre.
Electrical Connection
Your home must have an active BESCOM electricity connection for an on-grid or hybrid system. Additionally, the existing distribution board and wiring must be assessed to confirm it can accommodate the new solar circuit safely.
BESCOM Sanctioned Load
For homes with a sanctioned load of 5kVA or below, a load enhancement application to BESCOM may be required before a larger solar system can be connected. However, for most 3 to 5kW residential systems, existing sanctioned loads are typically adequate without modification.
Home Solar Installation — Step by Step Process
A professional home solar installation follows a structured sequence. Here is exactly what happens — from the first site visit to the day your system starts generating power.
- Step 1 — Site Assessment: A solar engineer visits your home, inspects the rooftop, measures available space, checks shading from nearby trees or structures, and reviews your BESCOM electricity bills to size the system correctly.
- Step 2 — System Design: Based on the site assessment, The solar engineer designs the solar system and confirms the panel count, inverter capacity, mounting structure type, cable routing, and ACDB/DCDB specifications. Furthermore, the solar engineer finalises the system type — on-grid, hybrid, or off-grid — based on your requirements.
- Step 3 — Quotation and Approval: The installer shares a detailed, itemised quotation.Once you approve the quotation, the installer initiates the PM Surya Ghar Yojana subsidy application if you are eligible — importantly, this must be done before installation begins.
- Step 4 — Material Supply and Inspection: The installation team delivers the solar panels, inverter, mounting hardware, cables, ACDB, DCDB, and earthing components to the site. The installation team verifies all components against the approved specifications before installation begins.
- Step 5 — Mounting Structure Installation: The installation team fixes the galvanised iron or aluminium mounting structure to the rooftop. The solar engineer sets the angle and orientation precisely to maximise solar generation based on Bangalore’s latitude.
- Step 6 — Solar Panel Installation: The installation team mounts the panels on the structure, connects them in series or parallel strings according to the system design, and wires them to the DCDB box.
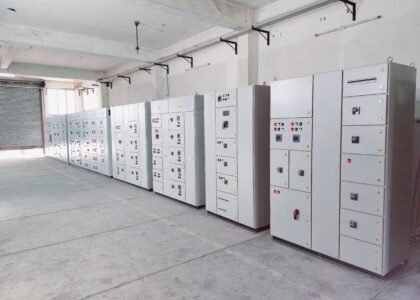
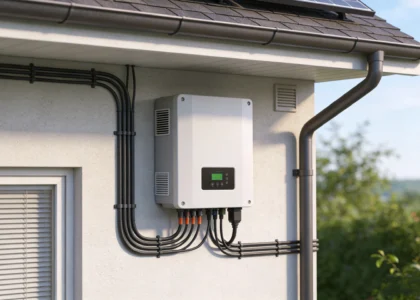
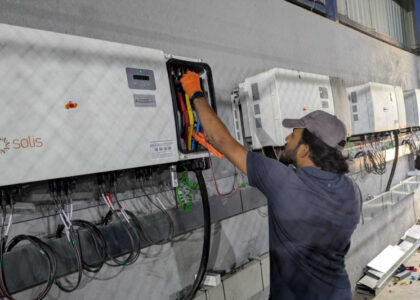
- Step 7 — Inverter and Protection Box Installation: The installation team installs and connects the solar inverter, ACDB, DCDB, surge protection devices, and earthing system. The installation team checks all components for correct specifications and safe installation.
- Step 8 — AC Wiring to Distribution Board: The electrician connects the inverter’s AC output to your home’s main distribution board through the ACDB, with a dedicated MCB for the solar circuit.
- Step 9 — System Testing and Commissioning: The engineer tests the complete system and verifies the open circuit voltage, short circuit current, and insulation resistance. The engineer commissions the inverter and confirms solar generation on the display and monitoring app.
- Step 10 — BESCOM Net Metering Application: The installer submits the installation documentation — system certificate, single-line diagram, and ACDB details — to BESCOM for net metering approval. Consequently, once BESCOM approves the application, it installs a bidirectional meter and officially connects your system to the grid.
Solar Panels for Home Cost — What Affects the Price?
Understanding what drives solar panels for home cost helps you make a better decision when comparing quotes from different solar installers.
Panel and Inverter Costs:
- Panel technology — TOPCon panels are more efficient and slightly more expensive than Mono PERC. However, on smaller rooftops, the higher efficiency of TOPCon generates more power and is worth the additional cost.
- Inverter type — on-grid inverters are the most affordable. Hybrid inverters cost more because they manage battery integration. Consequently, if backup power is not a priority, an on-grid system delivers faster payback.
Battery and Mounting Costs:
- Battery inclusion — adding a lithium battery to a hybrid system adds ₹40,000 to ₹1,20,000 depending on capacity. Nevertheless, for homes with frequent power cuts, this cost is justified by the backup power it provides.
- Mounting structure — flat rooftops use standard ballasted structures. Sloped or RCC rooftops may need custom mounting, which affects the overall solar installation cost.
DCR vs Non-DCR Solar Panels
- DCR vs non-DCR panels — DCR-certified panels qualify for the full PM Surya Ghar subsidy. Non-DCR panels do not. Always confirm DCR certification before approving any quote.
What Happens After Installation — Net Metering Setup
Here is how net metering works: during the day, your solar panels generate more electricity than your home typically uses. As a result, that surplus power flows into the BESCOM grid. BESCOM credits your account for those exported units — and those credits directly reduce your next electricity bill.
Why Professional Home Solar Installation Matters
Home solar installation is not a DIY project. The consequences of poor installation — from reduced energy output to safety hazards — are significant. Therefore, choosing experienced, certified solar installers near you is the most important decision in the entire process.
- Correct system sizing — an undersized system leaves money on the table; an oversized one fails BESCOM net metering limits.
- Quality components — cheap inverters and uncertified panels fail early. Moreover, they may not qualify for the PM Surya Ghar subsidy.
- Safe wiring and earthing — improper solar wiring is a fire and electrocution hazard. As a result, Installers must install every cable, conduit, ACDB, and earthing point according to CEA safety standards.
- BESCOM compliance — a system that is not installed to BESCOM specifications will fail the net metering inspection.
- Warranty and after-service — professional solar installers stand behind their work with documented warranties and a service team that returns when you need them.
FAQ:
Q: What is the cost of solar panel installation for a home in Bangalore?
Solar panel installation cost for a standard 3kW on-grid home system in Bangalore ranges from ₹1,00,000 to ₹1,20,000 before subsidy.
Q: How do I find trusted solar installers near me in Bangalore?
Look for BESCOM-empanelled solar installers who are registered under the PM Surya Ghar Yojana scheme. Additionally, check for ISO certification.
Q: How long does solar installation take for a home?
The physical solar installation for a standard 1 to 5kW home system takes 1 to 2 days.
Q: What size solar system does my home need?
The right system size depends on your monthly electricity consumption. As a general guide: a home with a monthly bill of ₹1,500 to ₹2,500 typically needs a 2 to 3kW system.
Q: Can I install solar panels myself at home?
Solar panel installation for home is not recommended as a DIY project. It involves electrical work that must comply with CEA safety standards.
Book Your Home Solar Installation in Bangalore
Eco Solar Energy is a Bangalore-based solar installation company serving residential customers across the city and surrounding areas. We handle the complete process — site assessment, system design, supply, installation, BESCOM documentation, and post-installation service.